政府网站什么程序做的企点官网
文章目录
- 一、项目概述
- 二、环境准备
- 三、创建GitHub OAuth应用
- 四、项目依赖配置
- 五、配置OAuth 2.0
- 六、创建控制器
- 七、创建视图
- 八、运行应用
- 九、用户界面展示
- 十、总结
在现代的Web应用中,安全性是一个不可忽视的因素。OAuth 2.0作为一种流行的授权框架,提供了一种便捷的方式让用户通过社交平台(如GitHub)登录你的应用。本文将详细介绍如何使用Spring Security实现OAuth 2.0登录,并在页面上展示用户信息。
一、项目概述
本项目旨在实现一个简单的Web应用,允许用户通过GitHub进行登录。我们将使用Spring Boot和Spring Security进行快速开发。
二、环境准备
确保你已经安装了以下环境:
- JDK 8或更高版本
- Maven或Gradle
- IDE(如IntelliJ IDEA或Eclipse)
三、创建GitHub OAuth应用
在开始编码之前,你需要在GitHub上创建一个OAuth应用。以下是创建过程的步骤:
-
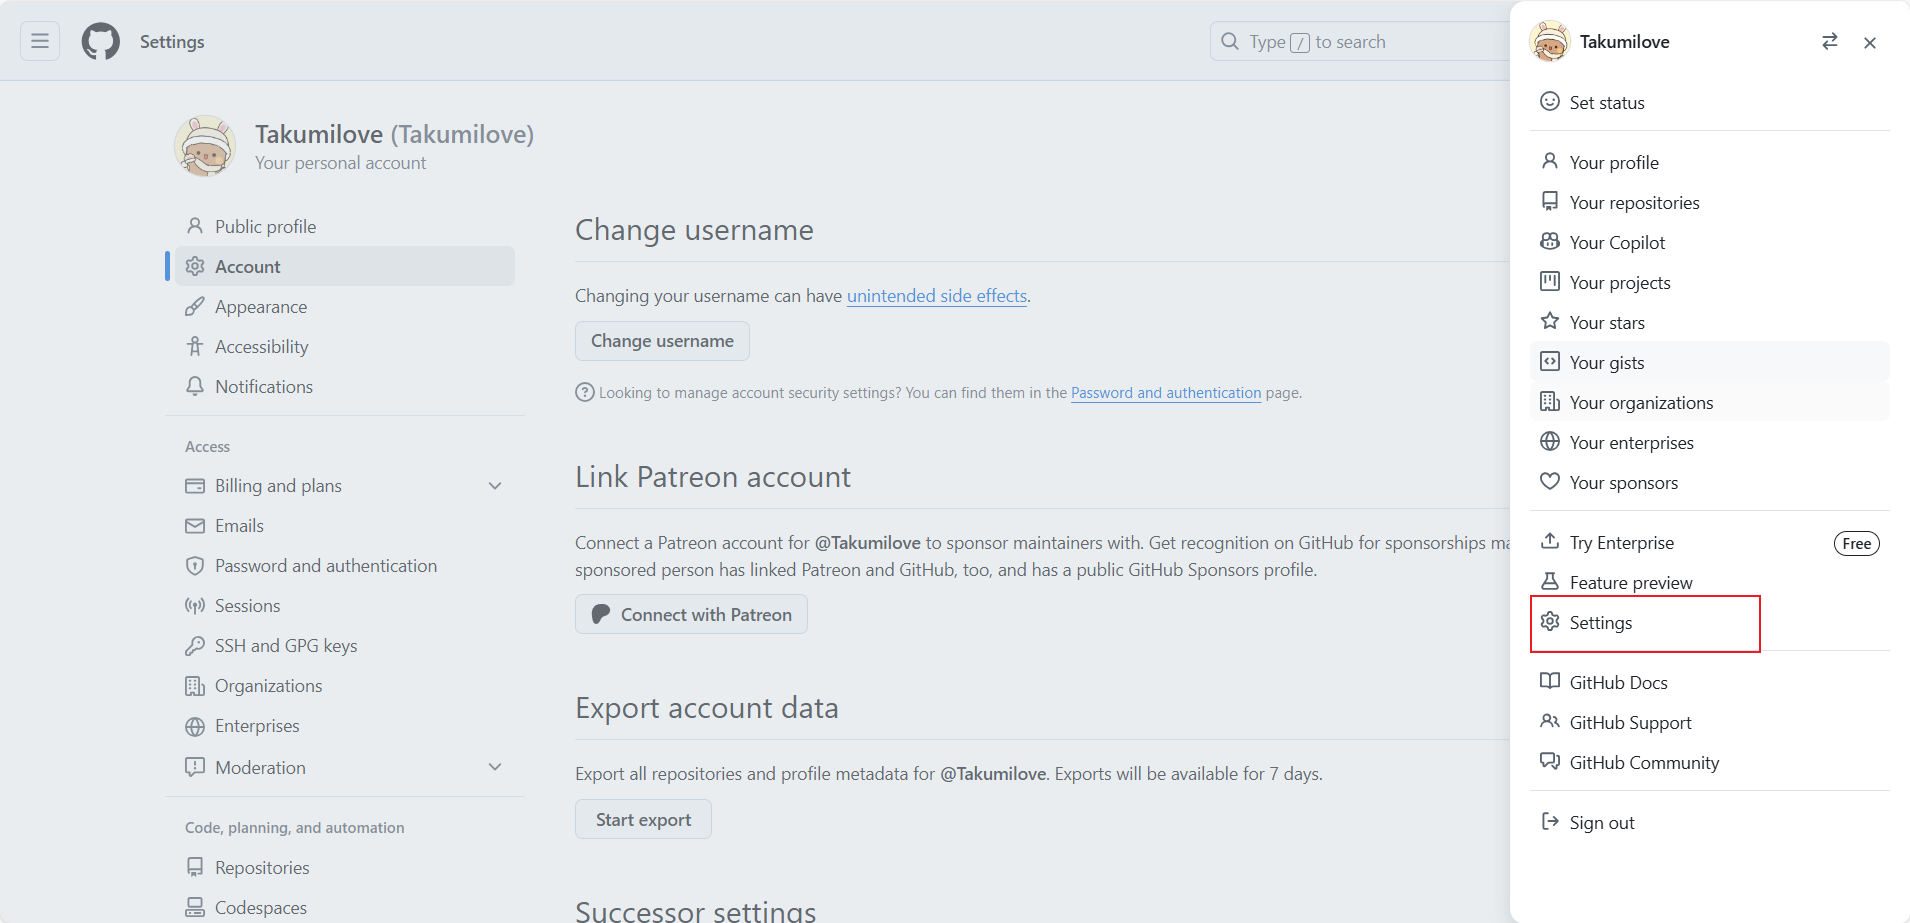
登录GitHub:访问GitHub官网并登录你的账号。
-
进入设置:点击右上角的个人头像,选择“Settings”。
-
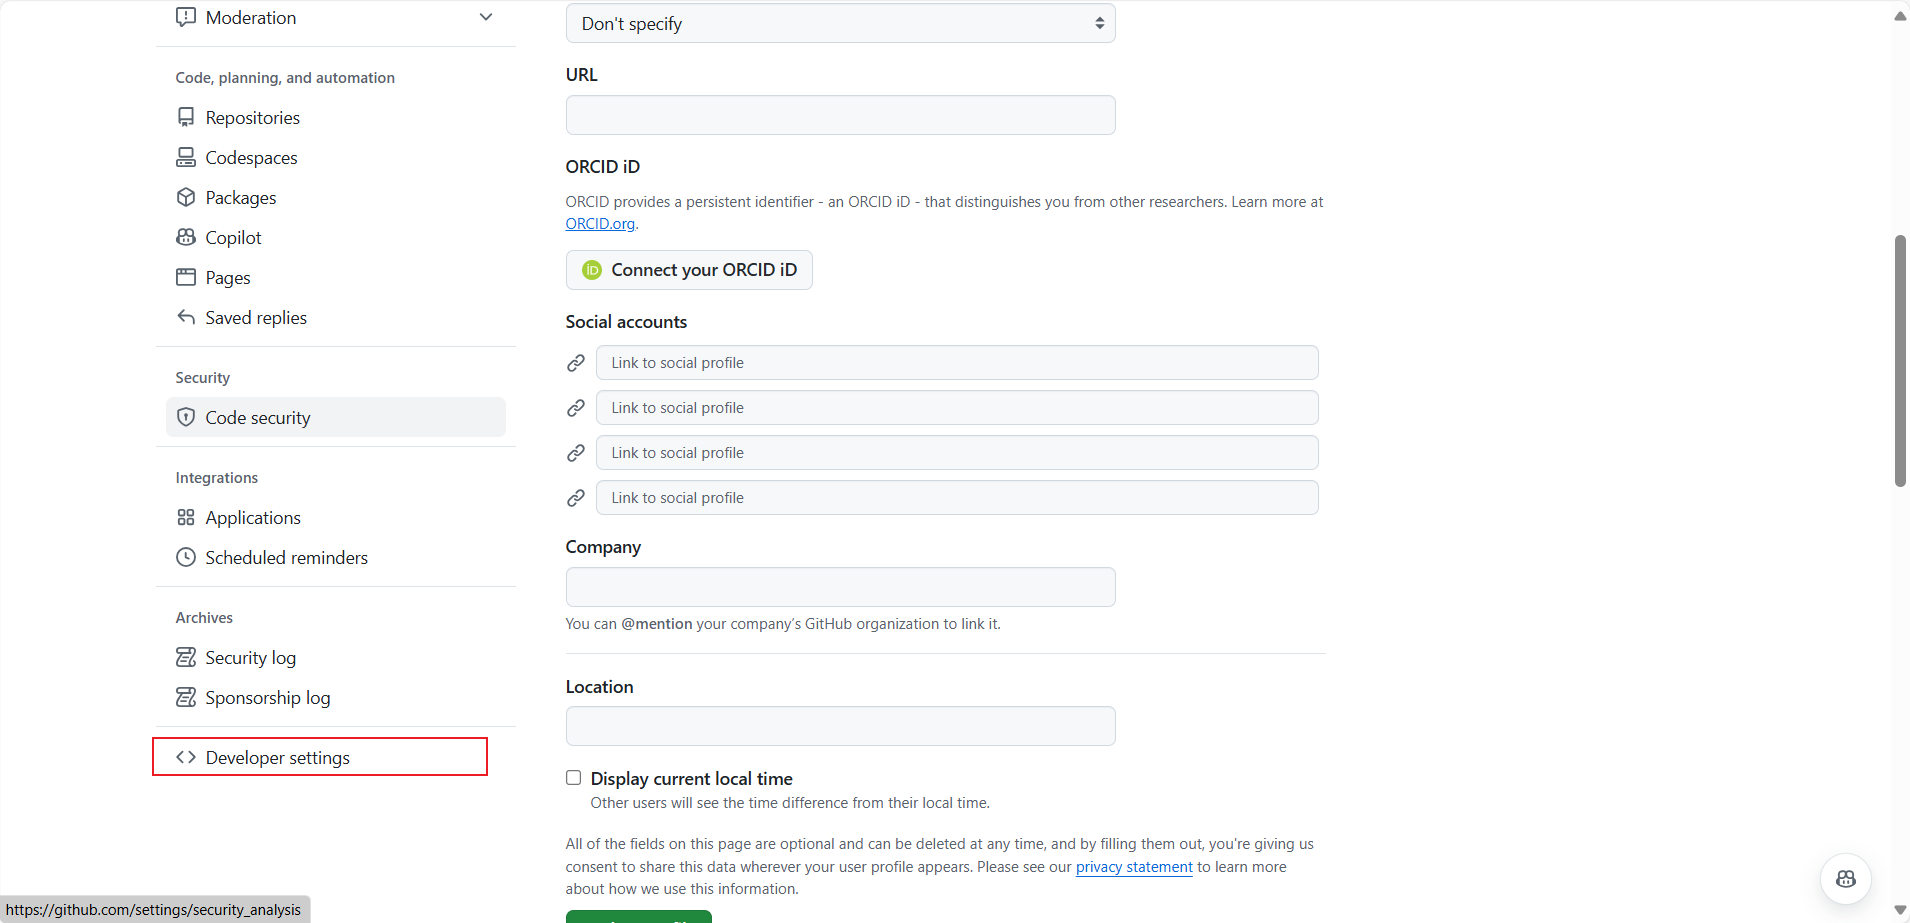
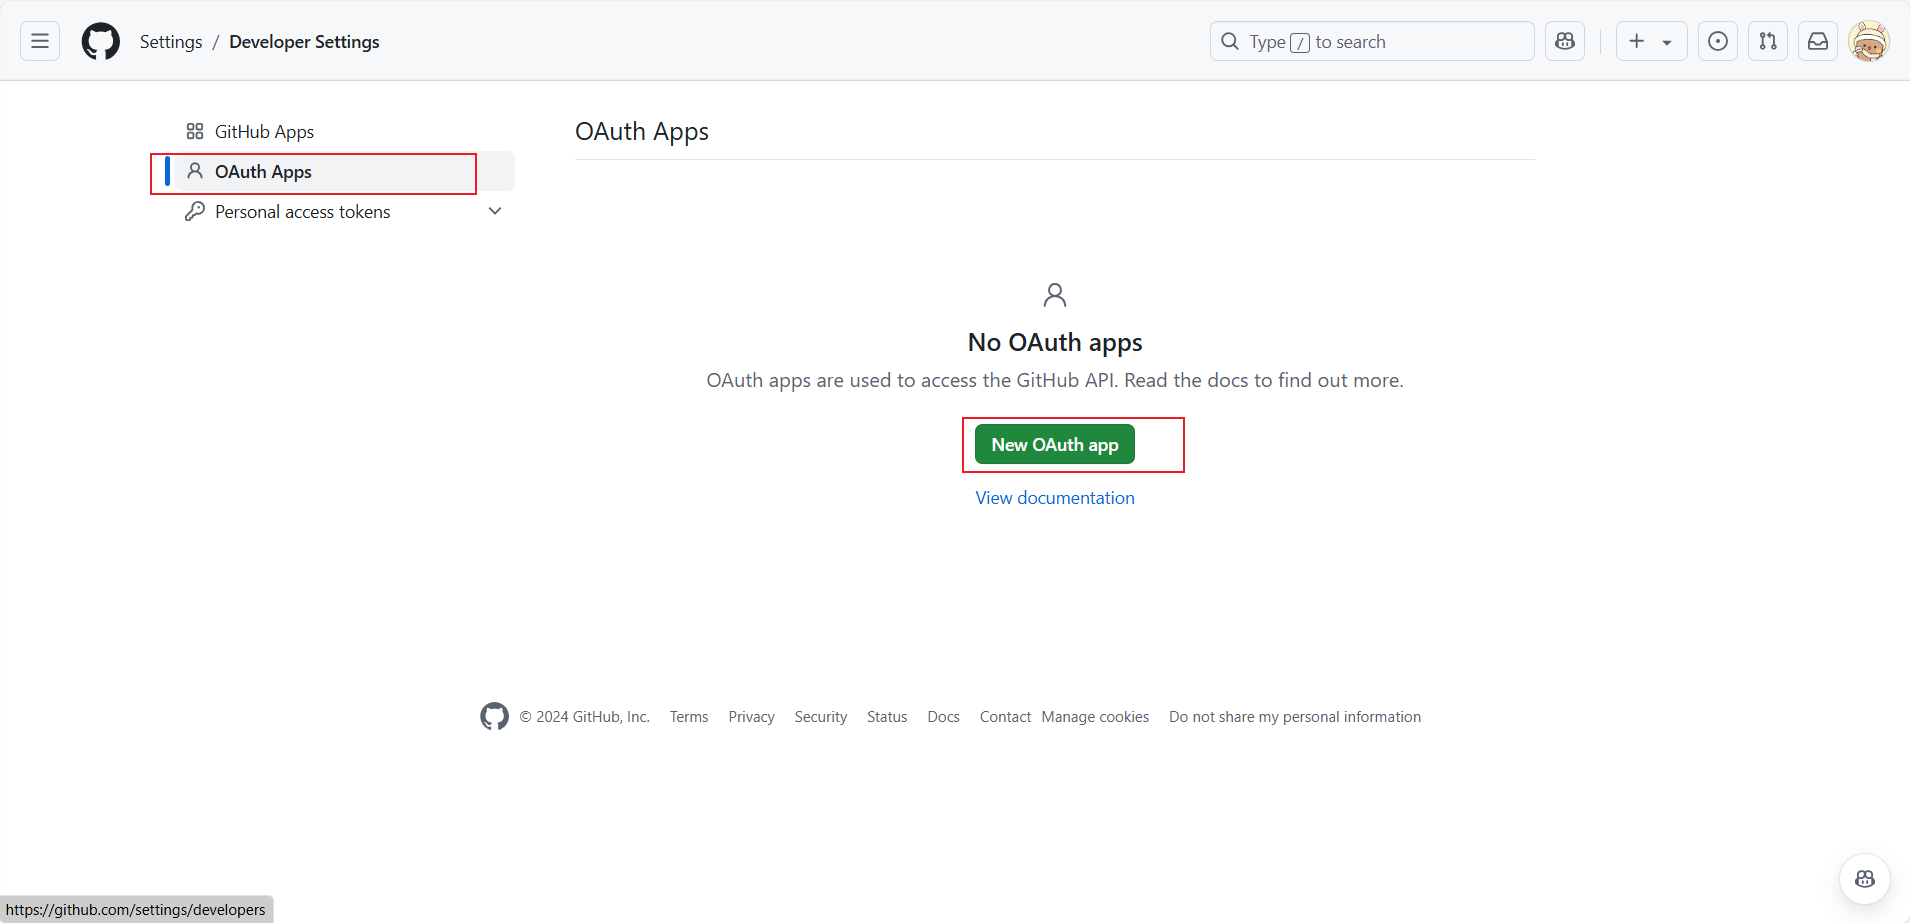
找到OAuth应用:在左侧菜单中,点击“Developer settings”,然后选择“OAuth Apps”。
-
注册新应用:点击“New OAuth App”按钮。
-
填写应用信息:填写应用名称、主页 URL 和回调 URL(通常是
http://localhost:8080/login/oauth2/code/github),然后点击“Register application”。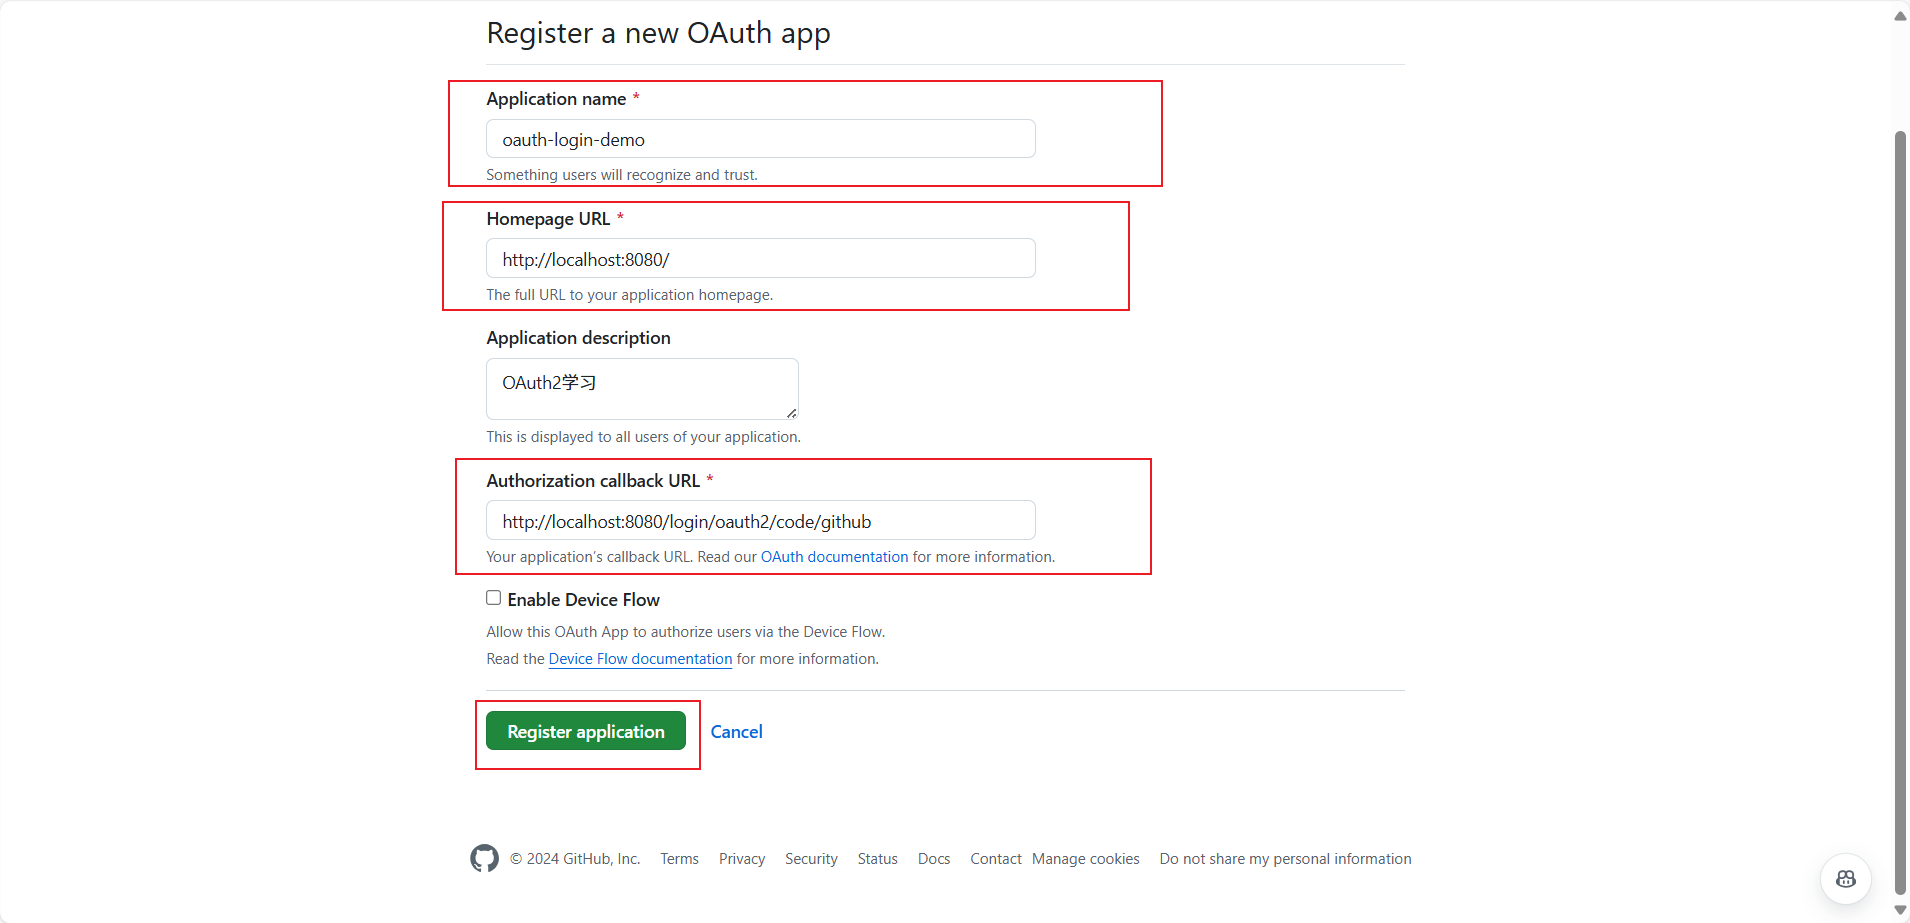
-
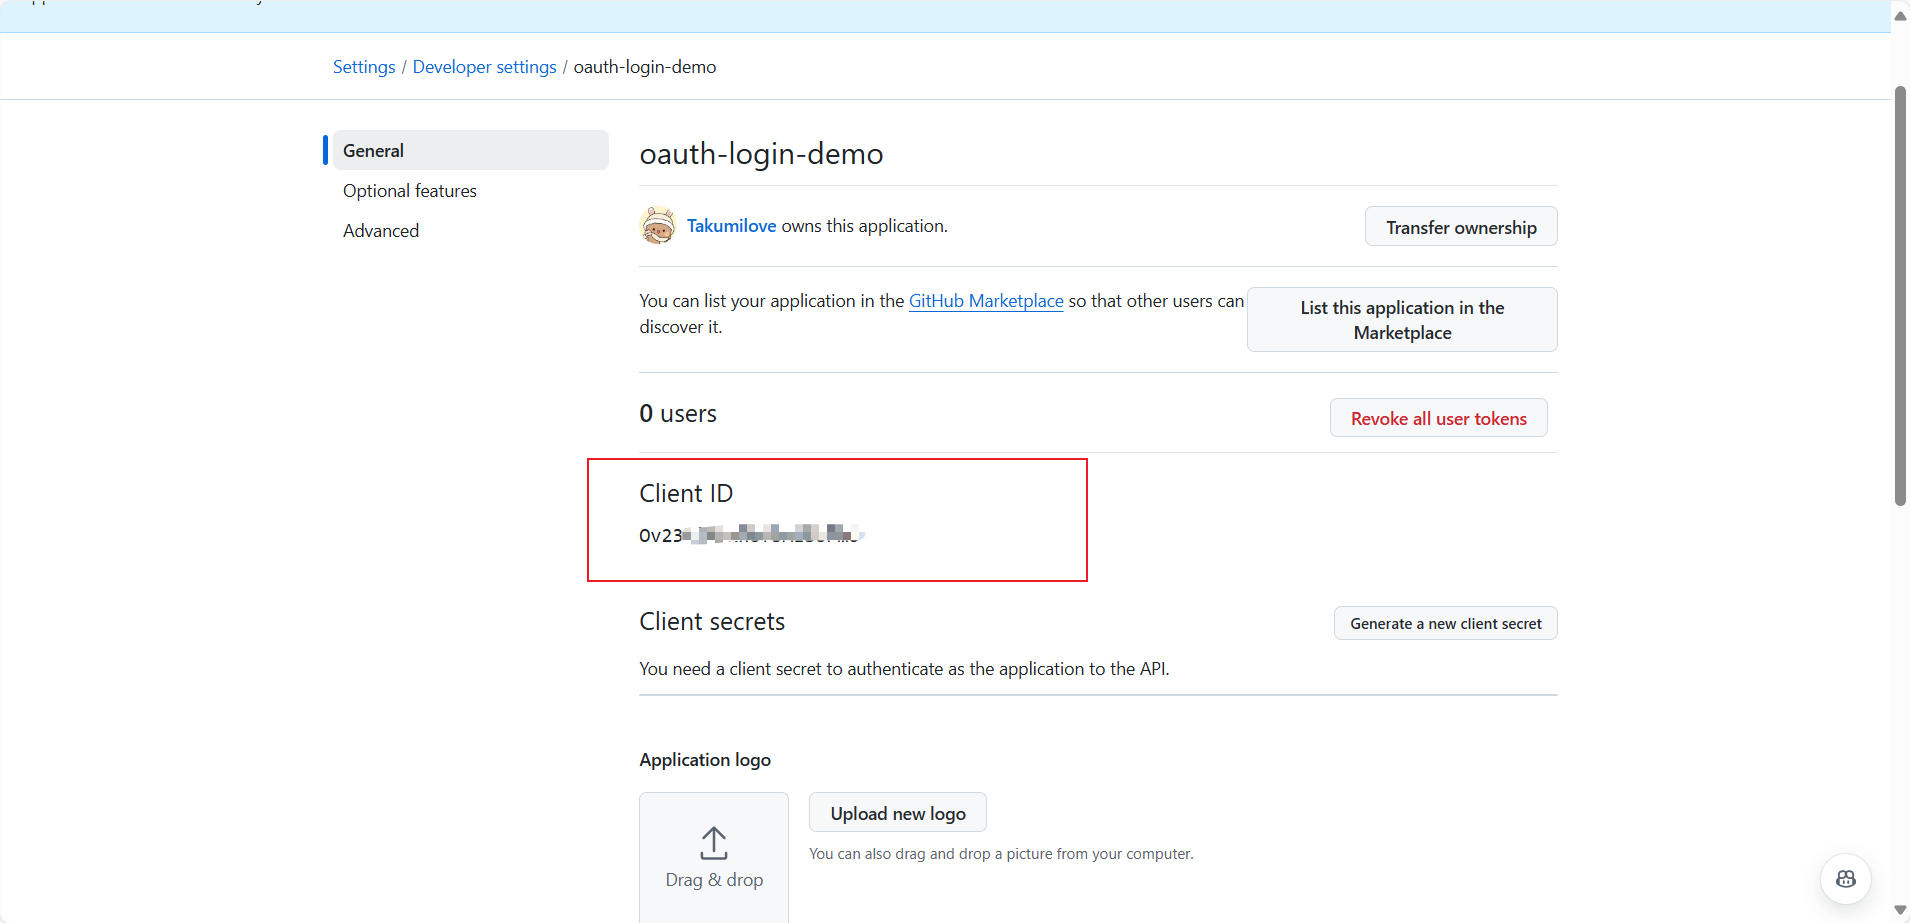
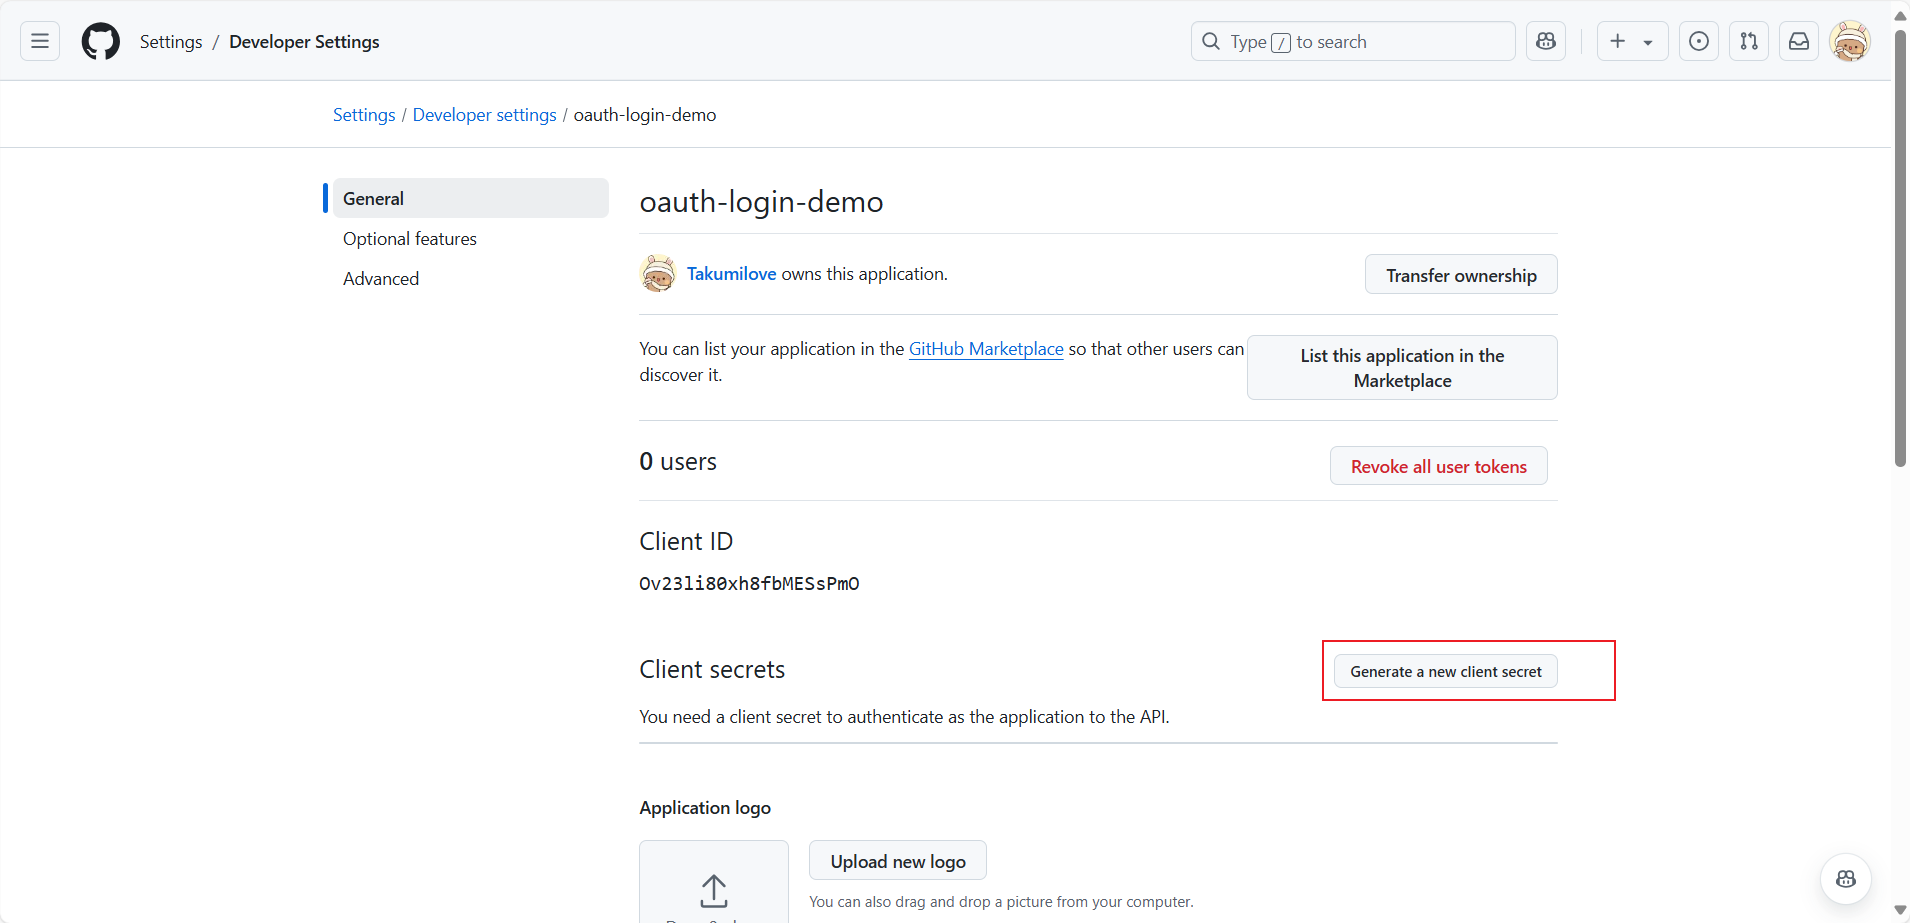
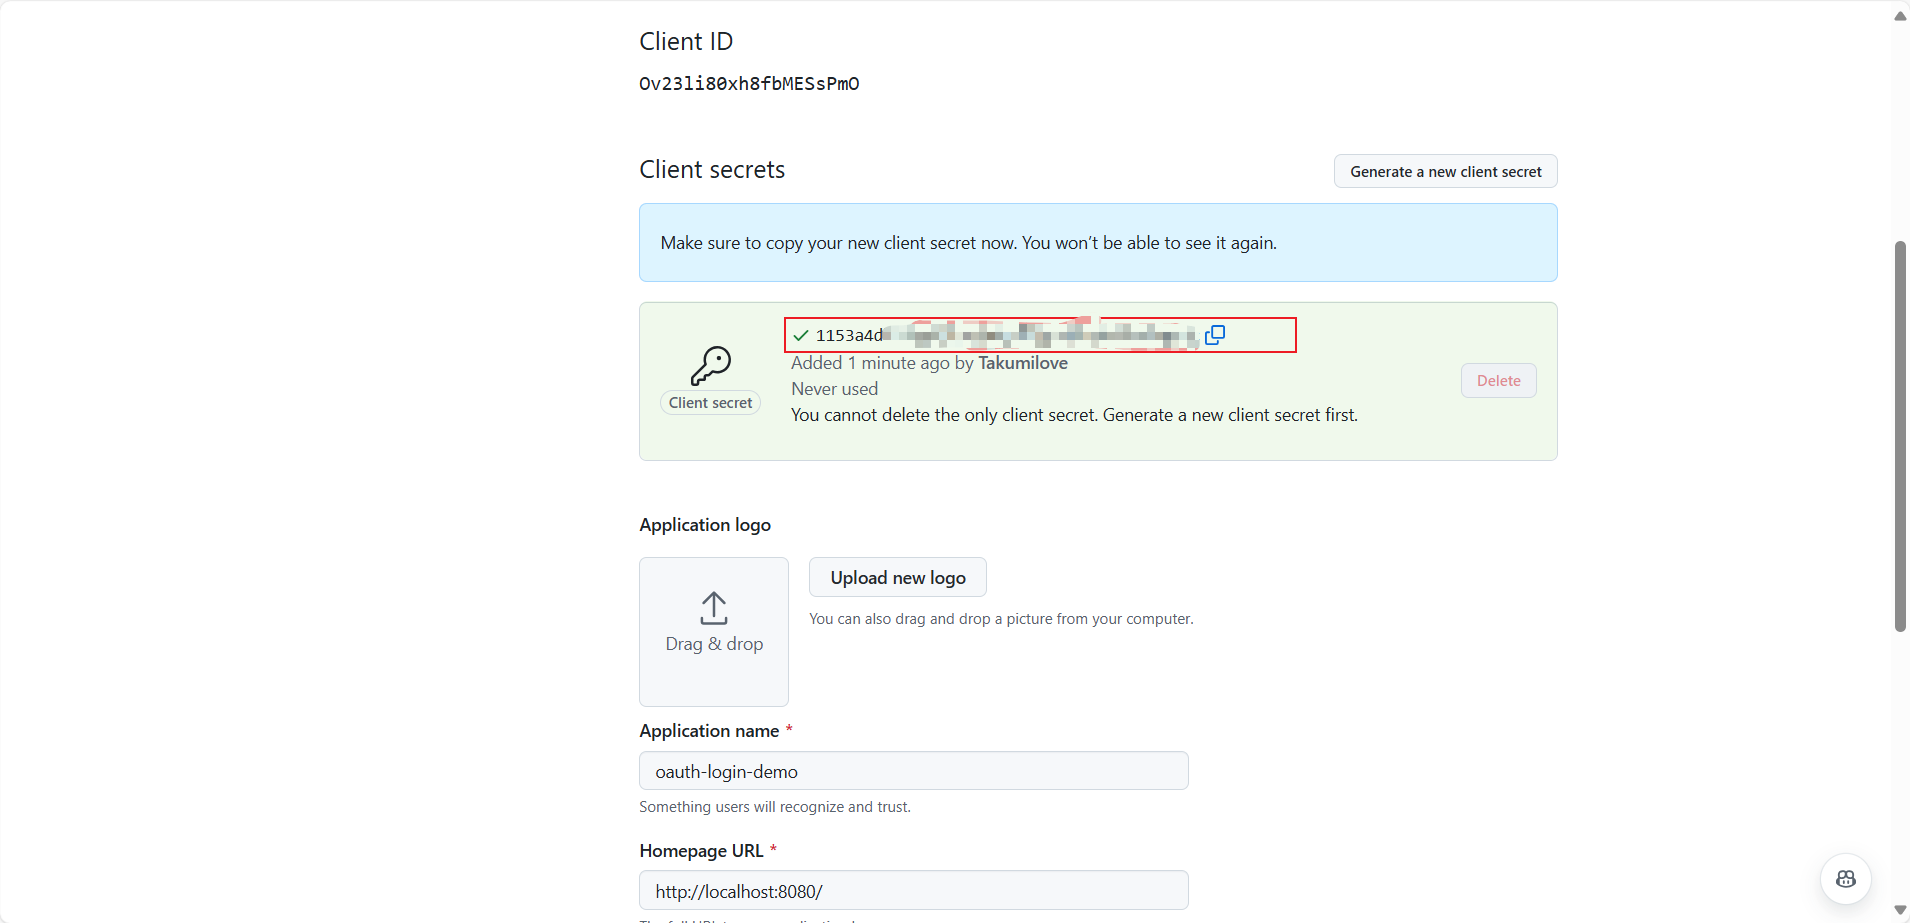
获取Client ID和Client Secret:注册完成后,你会看到Client ID和Client Secret,保存这两个值。
四、项目依赖配置
在你的pom.xml中添加以下依赖(如果你使用的是Maven):
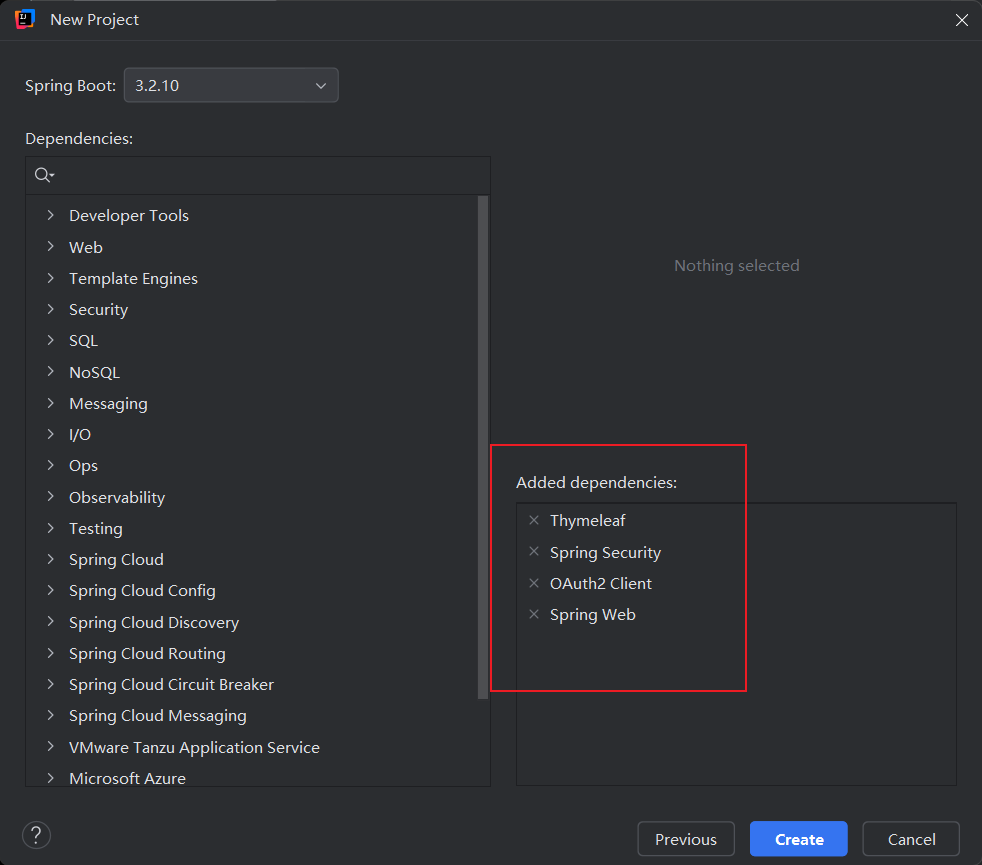
<dependency><groupId>org.springframework.boot</groupId><artifactId>spring-boot-starter-security</artifactId>
</dependency>
<dependency><groupId>org.springframework.boot</groupId><artifactId>spring-boot-starter-oauth2-client</artifactId>
</dependency>
<dependency><groupId>org.springframework.boot</groupId><artifactId>spring-boot-starter-thymeleaf</artifactId>
</dependency>
五、配置OAuth 2.0
在application.yml中配置GitHub的OAuth 2.0客户端信息,填入你在上面步骤中获取的client-id和client-secret。
spring:security:oauth2:client:registration:github:client-id: 填入你的数据client-secret: 填入你的数据
六、创建控制器
接下来,我们需要创建一个控制器来处理登录后的请求。以下是IndexController的代码:
package com.takumilove.oauth2logindemo.controller;import org.springframework.security.core.annotation.AuthenticationPrincipal;
import org.springframework.security.oauth2.client.OAuth2AuthorizedClient;
import org.springframework.security.oauth2.client.annotation.RegisteredOAuth2AuthorizedClient;
import org.springframework.security.oauth2.core.user.OAuth2User;
import org.springframework.stereotype.Controller;
import org.springframework.ui.Model;
import org.springframework.web.bind.annotation.GetMapping;/*** @author RaoPengFei* @create 2024/10/12*/
@Controller
public class IndexController {@GetMapping("/")public String index(Model model, @RegisteredOAuth2AuthorizedClient OAuth2AuthorizedClient authorizedClient,@AuthenticationPrincipal OAuth2User oauth2User) {model.addAttribute("userName", oauth2User.getName());model.addAttribute("clientName", authorizedClient.getClientRegistration().getClientName());model.addAttribute("userAttributes", oauth2User.getAttributes());return "index";}
}
七、创建视图
使用Thymeleaf创建登录后的视图,以下是index.html的代码:
<!DOCTYPE html>
<html xmlns="http://www.w3.org/1999/xhtml" xmlns:th="https://www.thymeleaf.org" xmlns:sec="https://www.thymeleaf.org/thymeleaf-extras-springsecurity5">
<head><title>Spring Security - OAuth 2.0 Login</title><meta charset="utf-8" />
</head>
<body>
<div style="float: right" th:fragment="logout" sec:authorize="isAuthenticated()"><div style="float:left"><span style="font-weight:bold">User: </span><span sec:authentication="name"></span></div><div style="float:none"> </div><div style="float:right"><form action="#" th:action="@{/logout}" method="post"><input type="submit" value="Logout" /></form></div>
</div>
<h1>OAuth 2.0 Login with Spring Security</h1>
<div>You are successfully logged in <span style="font-weight:bold" th:text="${userName}"></span>via the OAuth 2.0 Client <span style="font-weight:bold" th:text="${clientName}"></span>
</div>
<div> </div>
<div><span style="font-weight:bold">User Attributes:</span><ul><li th:each="userAttribute : ${userAttributes}"><span style="font-weight:bold" th:text="${userAttribute.key}"></span>: <span th:text="${userAttribute.value}"></span></li></ul>
</div>
</body>
</html>
八、运行应用
确保所有配置无误后,运行你的Spring Boot应用。访问http://localhost:8080,你将看到一个通过GitHub登录的选项。
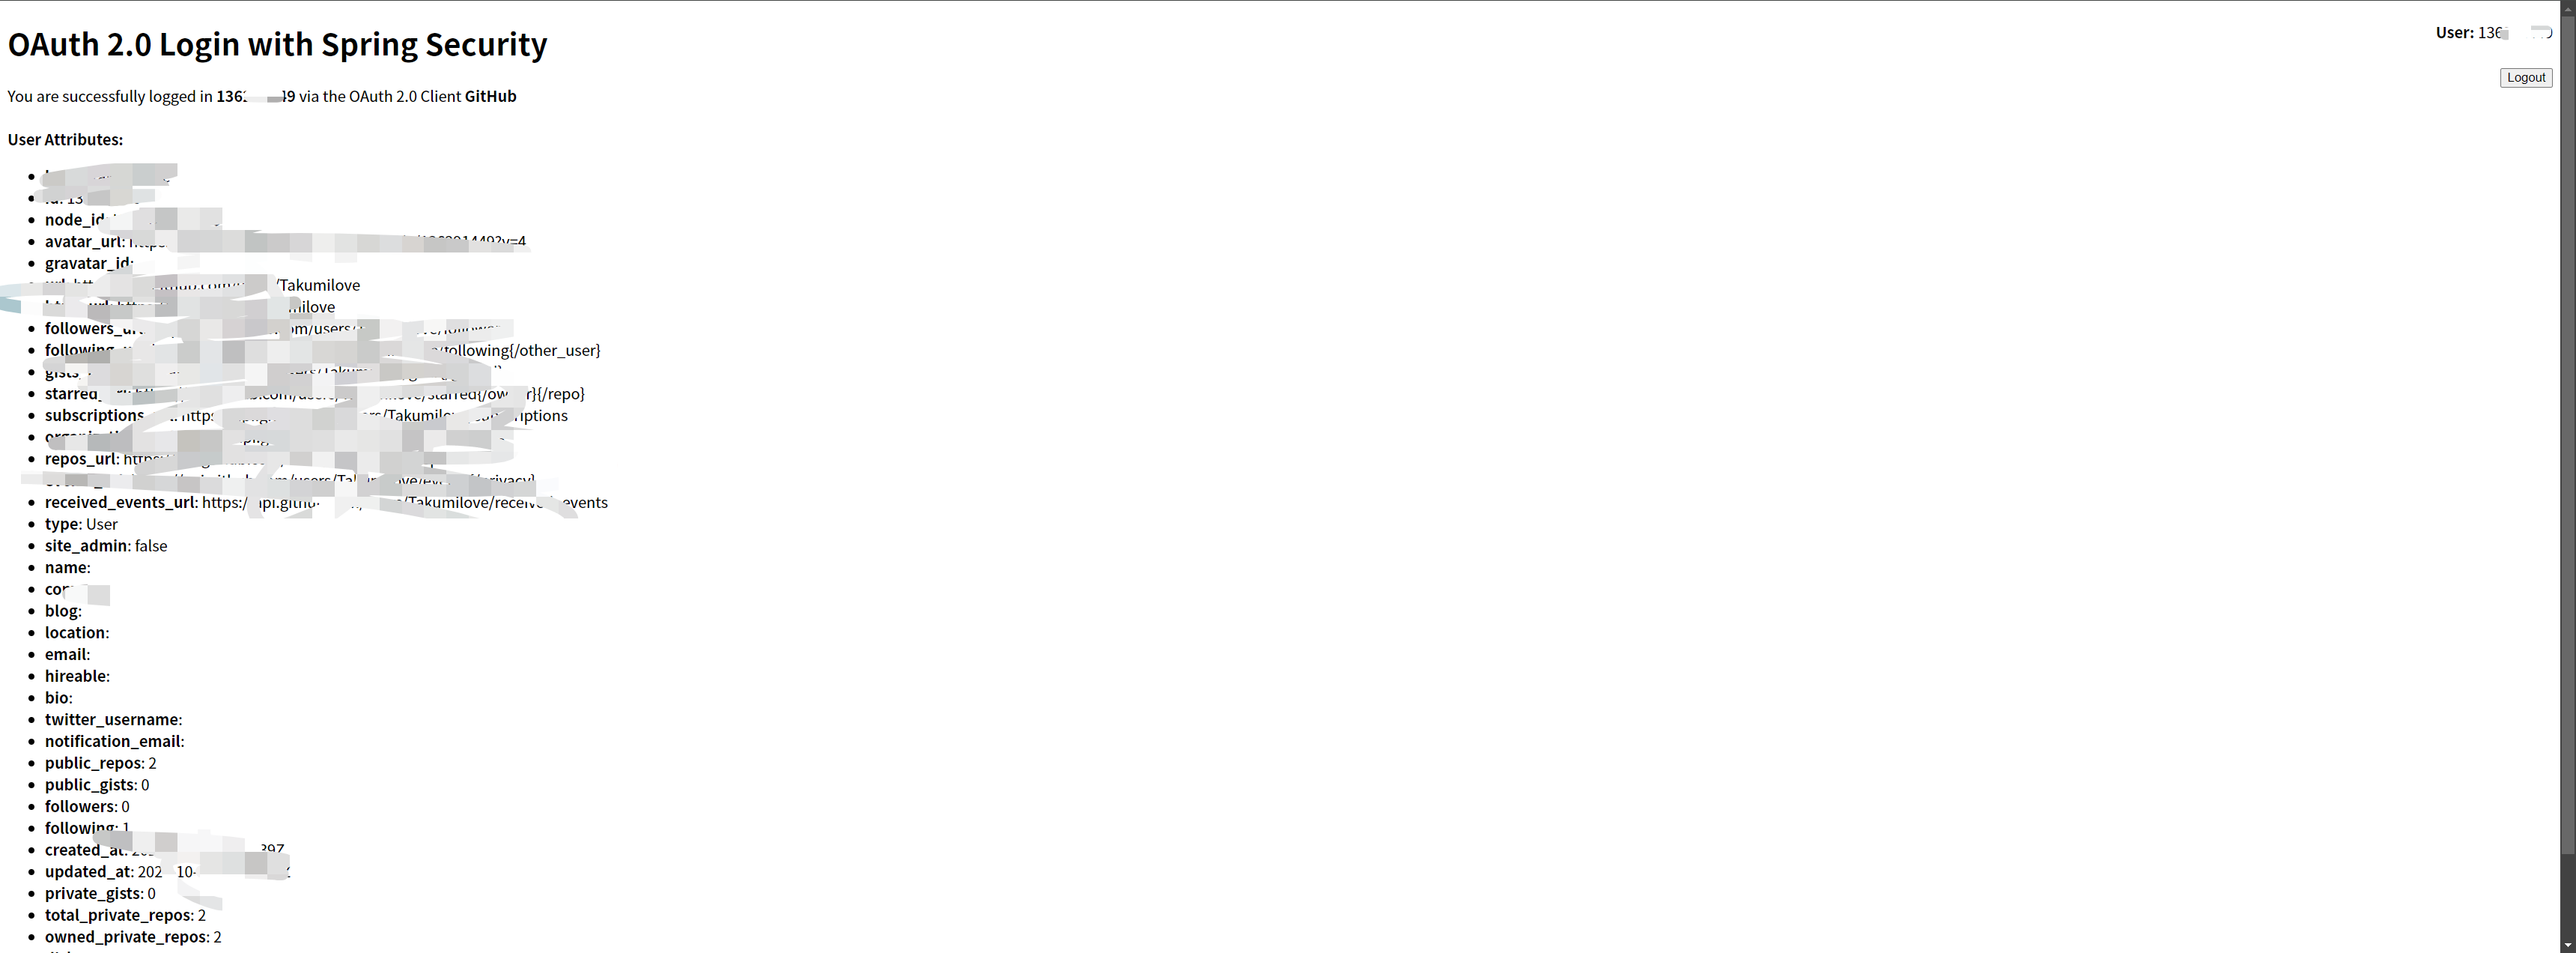
九、用户界面展示
在用户成功登录后,界面将显示用户信息,如下图所示:
十、总结
本文详细介绍了如何使用Spring Security实现OAuth 2.0登录,并展示了用户信息。希望通过这些步骤,你能够顺利地实现GitHub登录功能,提升你的应用安全性和用户体验。